Archive for the ‘DIY’ Category

Bench REMIX

Friday, March 20th, 2009

Last night I got home and was itching for a change. I was just in one of those moods where I wanted to either rip out the bathroom tiles or go buy expensive danish furniture. No money means no new tile or a brand new hutch….so it was time for a REMIX!

We’ve had this Ikea Flokati rug for a number of years and it is gross. It has been stored away and SHEDDING in the pit of a guest bedroom so that little Iggy would stop marking it.

BAD DOG.

Something about the rug smelling like a sheep made Iggy crazy and he kept putting little pee drops all over the thing. Yuck.

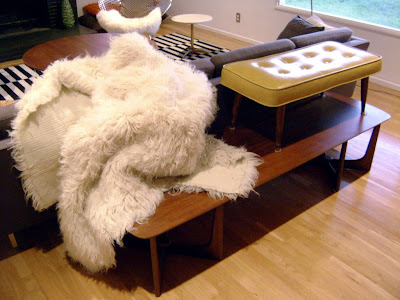
I also had this kind of ugly bench that was also wasting away in the guest bedroom as well. I bought it on the cheap at a thrift store and thought I would one day reupholster the cracking yellow vinyl in something fun…

I love everything sheep skin and thought that the rug would look really nice upholstered on the bench.

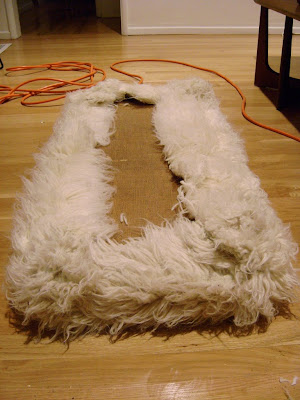
I cut a clean section out of the rug that was big enough to cover the bench

Removed all the legs – they just unscrewed.

Flipped over the rug so the good side was down and pulled out the trusty electric staple gun.

I just pulled the edges over and stapled them down onto the wood frame of the bench. I didn’t bother removing the old vinyl upholstery since it was pretty tight and solid. I was worried that the foam would be a mess underneath.

I stapled the rug section all the way around and folded the corners in. The rug was very furry and VERY forgiving so it didn’t matter if it wasn’t a totally clean and sharp upholstery job.

I then cut off the excess fur…

all the way around the edges so they didn’t hang down.

Screwed the legs back on and its DONE!

It took me about an hour and a half to get it all done and finished…with a few breaks playing with Iggy. He loves those Flokati fur balls.

Then like a serial killer I brushed, spot cleaned and vacuumed all the fur. It rubs the Flokati on its skin…or else it gets the hose again…

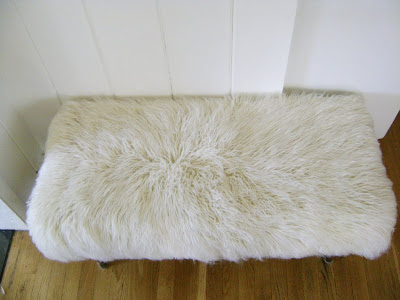
Ta-da!!! All brushed up like a show dog.

A lovely furry white ottoman. This way no ones walking on it and getting it all dirty.

I’m not sure where it will end up in the house, but the project scratched that itch for something new without spending any money!
Inspirational thingies

Friday, July 11th, 2008

A few things on the current “to do” list are giving me a little bit of trouble. Namely the front door hardware, and the direction the pink bathroom is going to go in. I’m on the hunt for some inspiration……cheap delicious inspiration…

I saw these on EBAY…and stupidly forgot to bid on them (they sold for only $15.51) . What a really great pair of vintage door escutcheons that I would have loved to use on my front door. How do you even pronounce that word – escutcheon?

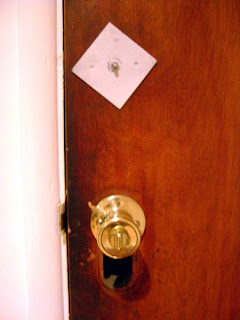
Anyhooooo…I really want to address the front doors lack of hardware. The reality lock box is still hanging on the cheapo home depot brass entry knob, making the Brick House look abandoned. Also check out the nice plate instead of a deadbolt.

The big problem is that stupid giant hole. I have to get something with an escutcheon or a back plate to cover it up. This is proving to be difficult in my price range which is about $150 – $200.

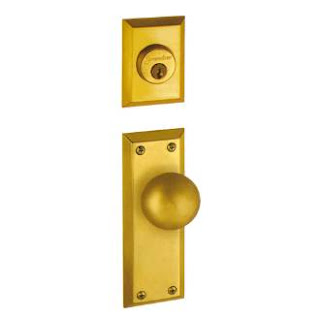
Here are a few options I’m thinking about:


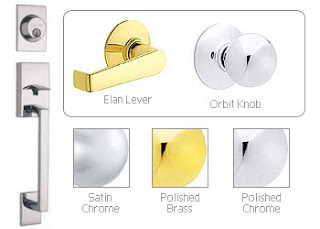
5th Avenue Combo Pack


Satin Nickel finish with a 5th Avenue knob : $208.24

Schlage Century Door Entry Set
Satin chrome finish with the Orbit Knob :
$166.40


Deadbolt Lockset Double Cylinder Knob by Omnia
Satin Chrome : $223.30

* I don’t think this will even work to cover the holes, I can’t find the dimensions…aaaahhhh.

If anyone knows of a good cheap mid century style entry lockset that will cover all the stupid holes in my door, let me know…I’m desperate.

For now I’m just going to cry about it. I can’t seem to find something that meets all my door measurement criteria and will be affordable and stylish. Stupid money and my lack of it.

Custom chair action

Tuesday, June 10th, 2008

I got this vintage gold mid century chair yesterday and loved its retro shape – especially the flared armrests. I kind of hate the fabric, but don’t have the time or money to reupholster it, and the fabric is in pretty good shape.

Iggy loves it. Every new chair I bring home he claims for a few days and then loses interest.
The bottom skirt kind of gave the chair a seventies vibe I wasn’t digging. It had wonderful mid century peg legs underneath, so I decided to remove the skirt and give the chair a cleaner look.

First I cut off the skirt leaving a few inches of fabric to pull underneath and staple to the bottom frame.

I used an electric staple gun to staple the leftover fabric to the bottom of the chair. It was really easy, just pull it tight and staple.

The legs unscrewed so I pulled them off, cut around the base for the legs and then screwed the legs back on top of the leftover fabric to finish off the corners.

So this is the final result! I like it a lot better and the shape of the chair really stands out now.
Maybe one day I’ll get it reupholstered, but for now $20 and 20 minutes of stapling really worked out well.

Gold Chair before….and Gold Chair after. What a sassy little minx.